Refurbishing a Cloudy Solar Light
Original article by S.Veigel 03/15/2021
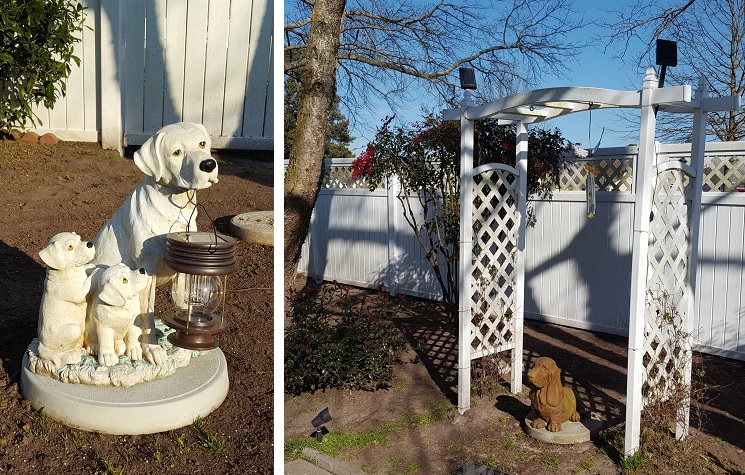 So I have 2 LED solar light areas in my yard that have a special meaning to me. One is a dog statue holding an LED lantern and the other area has 2 LED spotlights lighting an arbor, under which is the statue of a Bassett hound. To me, both are lighting the night for all the pets who’ve come and gone through this house. Which brings me to refurbishing the arbor spotlights and the frustration I’ve had finding good information about it.
Cleaning your solar battery powered yard lights is easy. Plenty of information on the web about cleaning. But extending the life of a solar light where the solar cell is white, that’s a different matter. It usually includes advice like, “wash but don’t scratch the plastic on the solar cell and spray it with a clear lacquer”. But if your solar cell is white, not scratching it doesn’t really help. And just spraying it with clear lacquer may improve the look a little, but it doesn’t do much to improve the function significantly.
Here one might say, “Just replace the lights”. I did when I refurbished the dog with the lantern but the lights on the arbor are a different story. I bought these because they have a long wire attached and I can place the solar panels where there’s decent sunlight with the spotlights down in another area. The plan for the wires is to run white PVC pipe down the arbor and across the bed so the wires don’t get cut with the necessary gardening. And at $20 each when I bought them, not to mention the envisioned hassle of replacing them, I’d like to keep them working for a while.
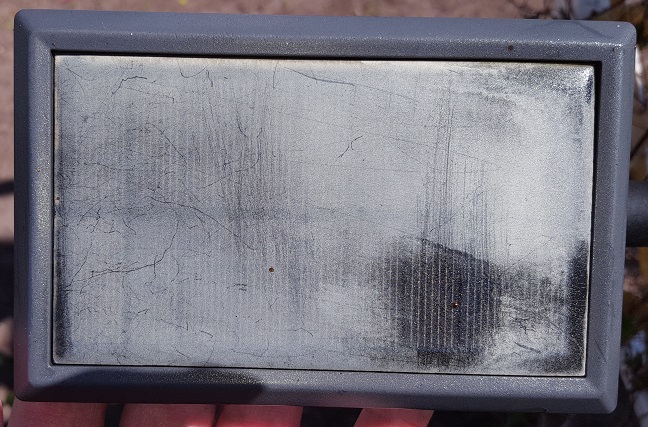 On the left here is a photo of one of the solar cells. UV light from the sun over the years has damaged the plastic so much it has turned it totally white. In this photo I applied the advice I got on the web. Clean with soapy water, but don’t scratch it and spray on (don’t use a brush) clear lacquer. Notice here that the only visible cells now are where I scratched it. The white color that remains, even though it has been sprayed with clear lacquer, doesn’t just diffuse the incoming light, it reflects it away from the cells.
Time to just go for it. The plastic has already been badly damaged. Grab some 400 grit sandpaper and start shaving off the damaged plastic. Sand lengthwise and notice you quickly get powder off the surface. This is the damaged plastic. Wipe the dust off occasionally with a rag and then put a spot of mineral spirits on the rag to wipe the cell clean. Now that you can actually see what’s left to do, repeat until you start seeing the white go away.
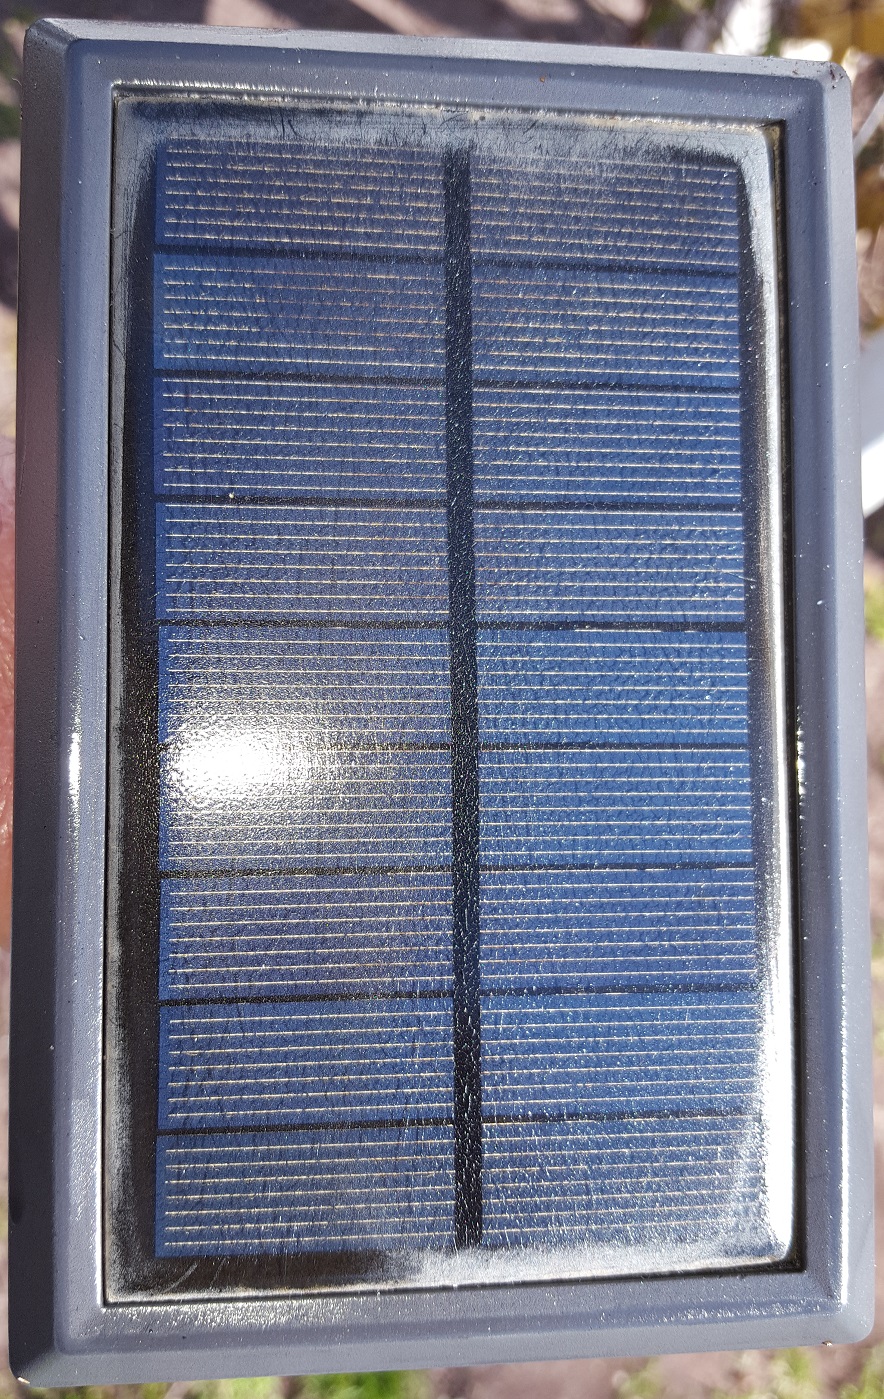 The idea here is that you have to resurface the plastic. A little white around the edges doesn’t matter, but you can then use 1000 grit sandpaper to polish it a bit more if you like. Just remember, you’re literally intentionally scratching off some of the surface so do this by hand and don’t get overzealous. You want to remove the damaged plastic, not the whole surface.
Once you can clearly see the cells below the outer plastic coating it’s time to give it back some protective surface. That’s when you reach for a spray can of clear lacquer. Wipe the dust off the surface again with a little mineral spirits on a rag. Give it a couple minutes to dry and then spray on your first coat of lacquer. Spray even strokes, wait about 20 minutes between coats and repeat until you have 3 coats on.
 Tip: If you’re concerned about over spray on the housing, if it’s a different color or material, use some painters tape around the edges and then remove the tape while the lacquer is still wet. In my case the housing was all black plastic. So even the housing could use a dressing up. I had already cleaned the solar panel and housing so I just sprayed the whole cell surface and around the edges of the housing to darken it all up a bit.
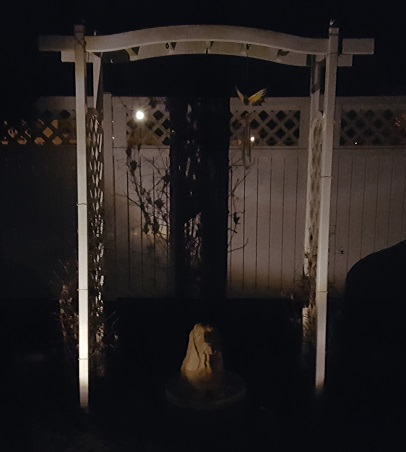
And the results? After years of UV damage these solar cells were still charging the batteries and lighting up at night. But only for a few hours. They were usually out or dim before midnight. After light sanding and clear coat? Well, look at this last picture. This was taken at 4 am on a camera phone with no flash and the arbor was still bathed in lights. As a matter of fact, there was still dim light when the sun came up.
Need I say it? Results may vary and depend on the condition of the unit and accessibility to good sunlight. If results are poor, check the batteries and/or replace them for good measure. If all of this still doesn’t work there may be a fault in the switch or electronics and you may just need to replace the unit.